Showing posts with label flame. Show all posts

4 Baked Mashed Potatoes

Wednesday, January 12, 2011


Okay, so we're really stretching it here in our house.  We haven't been out of the house since Sunday!  Today is yet another snow day stuck at home.  We're getting creative with the items I have left in my fridge.  Remember those mashed potatoes I served with the stuffed peppers?  Well, I used the leftovers in last night's dinner.

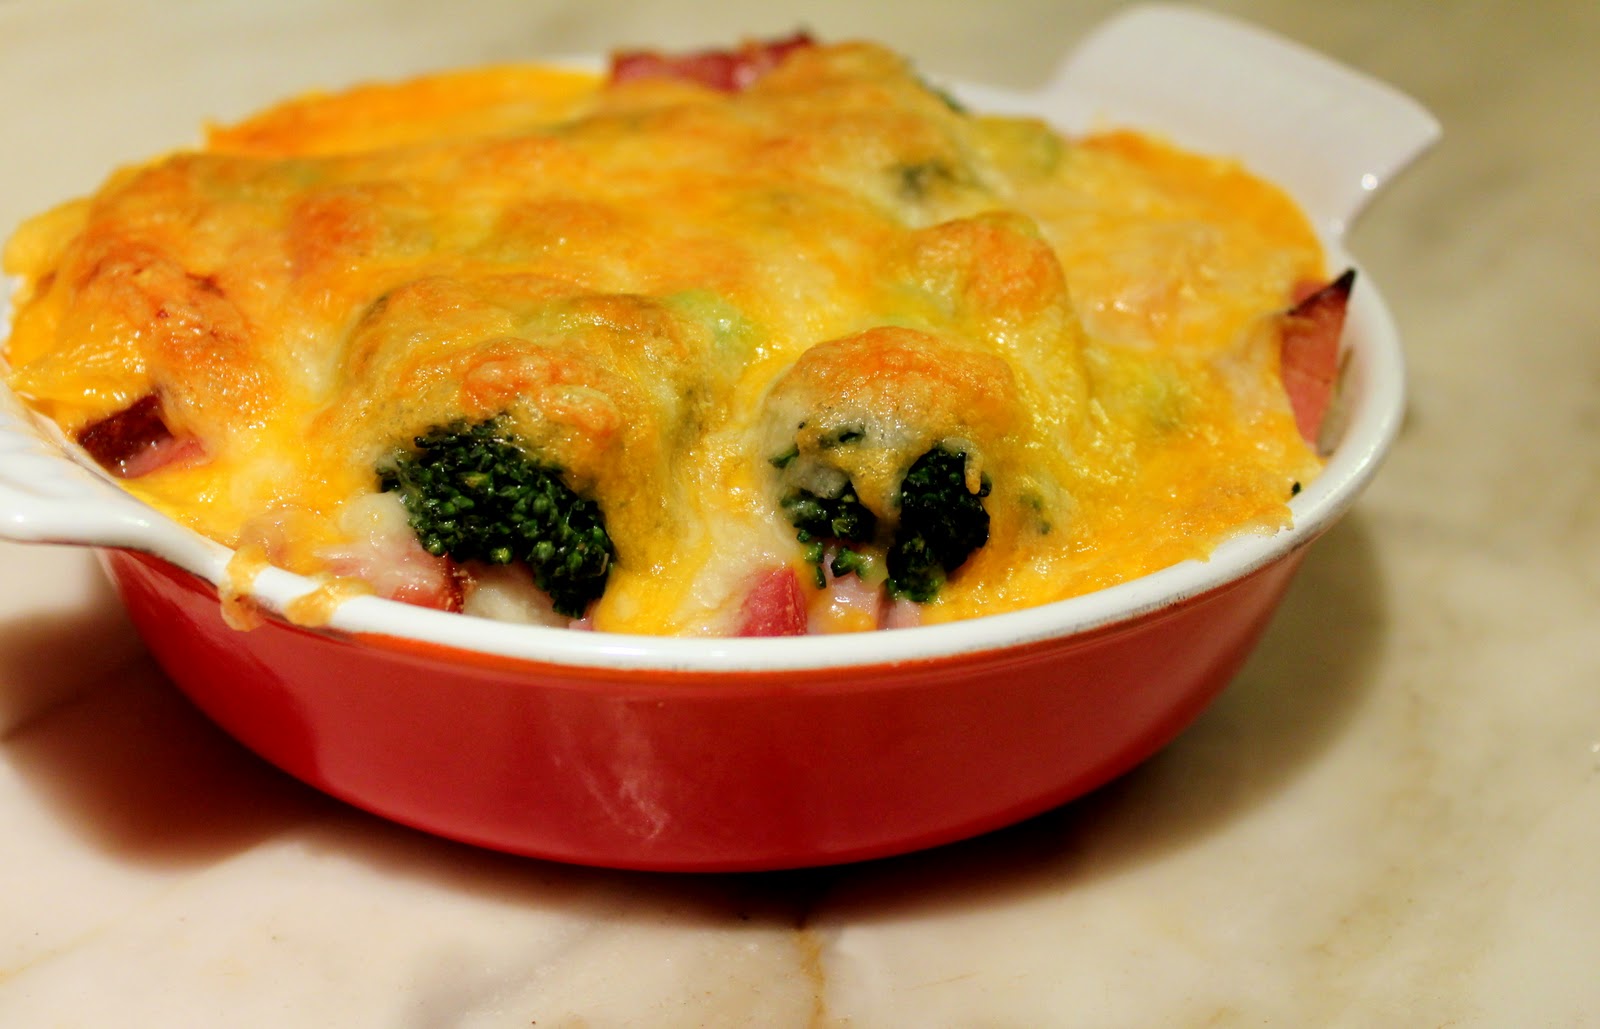
When I was vacationing in England as a girl, a fast food staple besides fish & chips, bangers & mash and Cornish pasties was a loaded baked potato.  You could get them almost anywhere.  They had a variety of hearty and delicious toppings, my favourite of which was ham, cheese and broccoli.  It's really so simple with mashed potatoes, just layer the potatoes in an oven-safe dish (and I mix it with a little shredded cheese), diced ham, lightly steamed broccoli and cover with as much cheese as you like.  Bake at 375 for about 10 minutes or until it's heated through and the cheese on top is bubbly.

Hmmmmm.


Ella really threw a fit when she saw hers because she did not want to try it.  However when she did, she said it was "REALLY good" (several times!) and ate it right up.


Hopefully we'll be able to get out at some point today.  Otherwise one or more of us may go nuts!
Pin It

6 Pillow Dinner Rolls

Friday, December 24, 2010


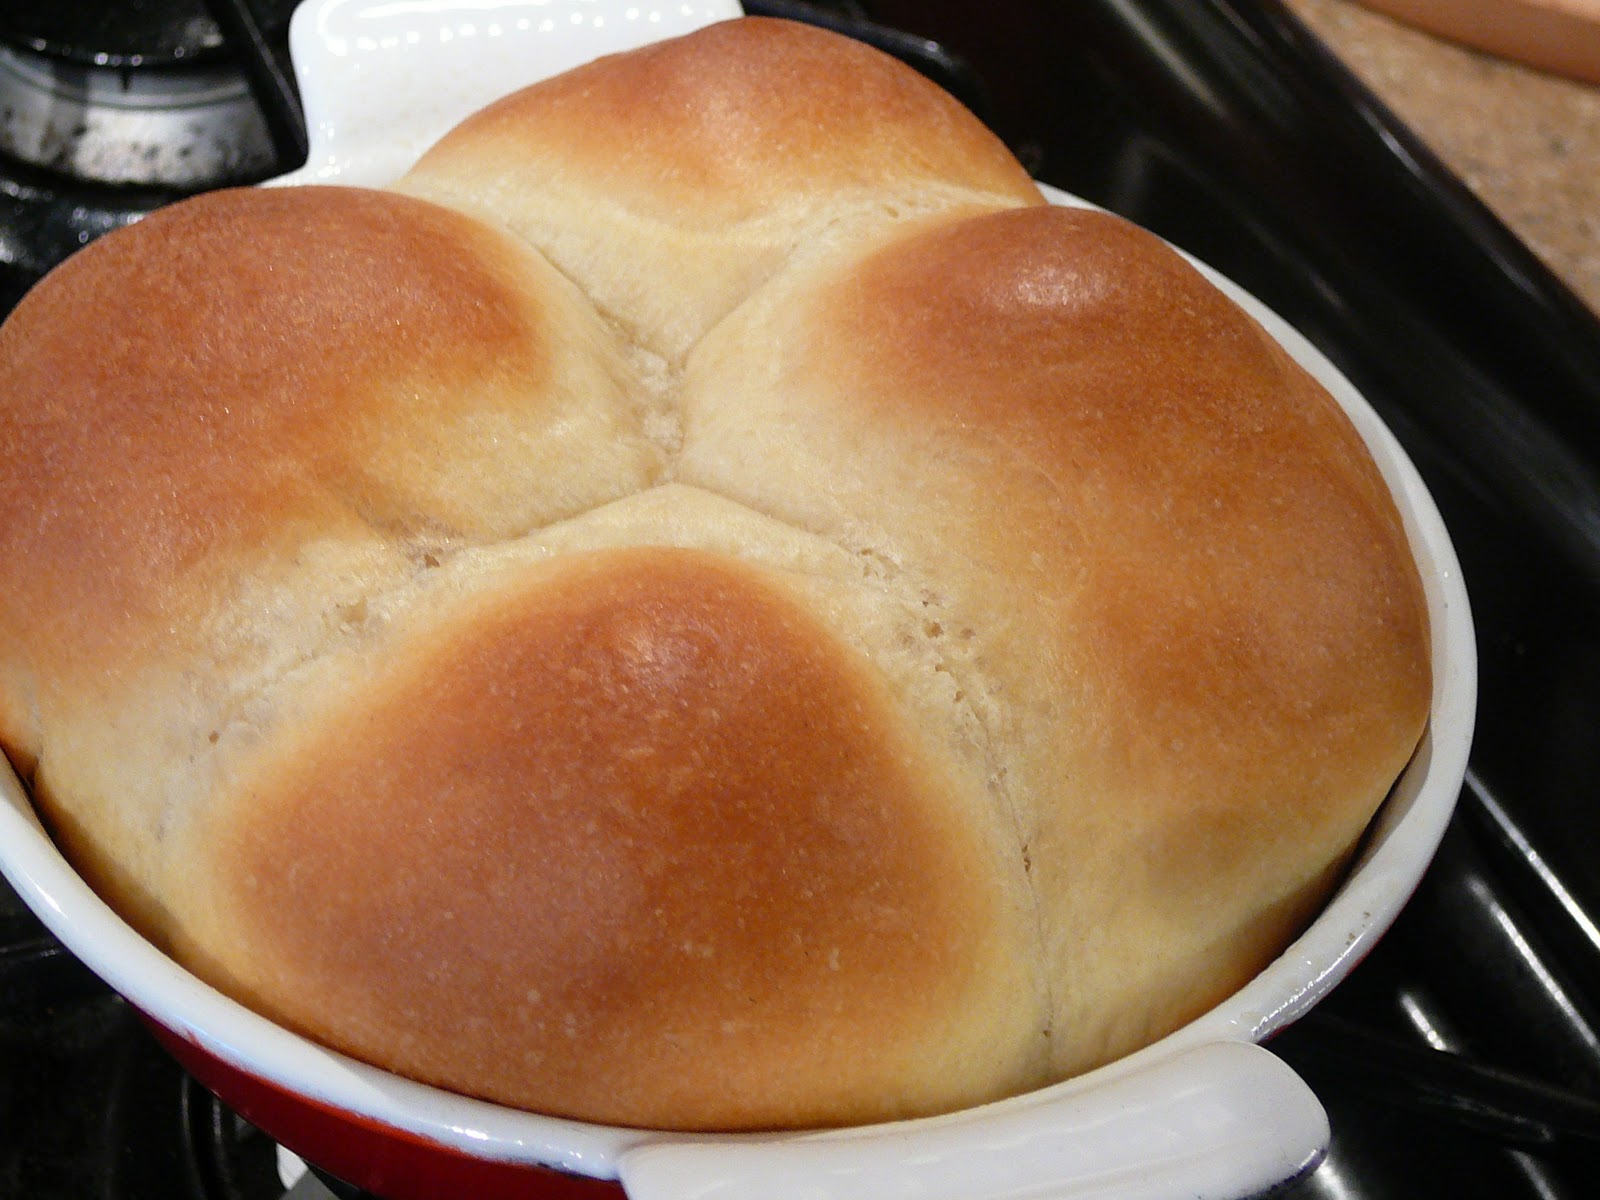
Okay, corny name, right?  I swear you will agree that that's exactly what these are if you make these.  I nearly wept tears of joy when I took my first bite, and my husband's eyebrows went sky-high, and he said "Wow." (that's like jumping up and down for him.)  This recipe was adapted from AllRecipes.com, but I have made several changes.

4 1/2 teaspoons active dry yeast
1/2 cup warm water
2 cups warmed milk
6 tablespoons room-temp shortening
3 tablespoons room-temp butter
2 eggs
1/4 cup sugar
1 1/2 tablespoons honey
3 teaspoons salt
6 cups all-purpose flour (up to 7 cups)

In a large mixing bowl, bloom the yeast in warm water. Add the milk, shortening, eggs, sugar, honey salt and 3 cups flour; beat until smooth. Stir in enough remaining flour cup-by-cup to form a soft dough (for me that was 6 cups - it will be sticky, but not too sticky and not liquidy.) If you have a stand mixer, beat for about 5-6 minutes or until the dough forms a ball.  Otherwise turn onto a floured surface; knead until smooth and elastic, about 6-8 minutes.  Place in a greased bowl, turning once to grease top. Cover with plastic wrap and let rise in a warm place until doubled, about 1 hour.

Punch dough down. Turn onto a lightly floured surface; divide into four equal pieces, and then each quarter will be again divided into four equal pieces (so you will get 16 rolls from half the dough, or 32 rolls total.) Shape each into a roll by pulling the sides down so it's round and smooth on top, and pinch the seam tightly at the bottom, and place seam-side down.

Place about 1/2 in. apart on greased baking sheets. Cover with plastic wrap and let rise until doubled, about 30-45 minutes.

Bake at 350 degrees F for 20-25 minutes or until golden brown. During the last five minutes of baking brush with melted butter.  Let cool in the pan for 5 minutes, then remove to wire racks.

If you don't need that many rolls at once, you can freeze the dough before the second rise.  Place the shaped rolls on a greased cookie sheet and freeze for 20-30 minutes and then combine into a sealed plastic bag. When ready to bake, remove from freezer and place onto cookie sheet, and let rise until doubled, then bake according to the directions above.


The shortening is what makes these so light and fluffy, and the butter gives it some extra flavor.  These are incredibly tender and fluffy, they are amazing!!  Serve with butter and honey.
Pin It

21 Hungarian Porkolt Stew

Friday, December 10, 2010


There is little that is more comforting on a cold day than a kitchen warmed by the oven, and filled with the fragrances wafting forth from it.  I found this recipe for a Hungarian stew while browsing for pork chop ideas.  The base recipe is found here, though I have made my own additions and tweaks.  My recipe makes 4 servings.

You'll need:

4 porkchops
2 ounces of pancetta or bacon, diced
1 large onion, diced
1 yellow or orange bell pepper, seeded and diced
4 cloves of garlic, minced
1.5 Tbs Hungarian (spicy) paprika
1 Tbs Primo27 spice blend (opt, but soooo good)
1 14oz can of diced tomatoes
1-2 cups chicken or beef broth
salt and pepper to taste
3/4 cup of sour cream
cooked egg noodles

Begin by browning the pancetta over medium high heat in a large, deep oven-safe skillet or Dutch oven.  If it doesn't have a lot of fat content, add a little bit of olive oil (or some saved bacon fat from your fridge...you know you have some....)  To the browned pancetta, add the onion, bell pepper, garlic, salt and pepper and cook until translucent.  The original instructions say to cook the pepper separately, so it's not pictured here, but I don't see the need for that extra step, so feel free to cook them all together.


Next, with a slotted spoon remove the veggies and pancetta to a bowl and leave the drippings in the pot.  Add the paprika and Primo27, if using, and mix through.


Now, brown the pork chops in the leftover fat, and add a little extra if needed.


Remove to a cutting board and let them rest for 5 minutes, then cut into bite-sized cubes.


My chops were bone-in, so I cut out the bones and diced the meat, but added the bones back into the pot to cook all those full flavors into my stew.  Add the meat back to the pot with the bacon and veggies, as well as the can of tomatoes and about 1 cup of broth.  You want there to be enough liquid to handle a long, slow cook time in the oven and not dry out, but not too much that it's completely covered and swimming.


Give it a stir, cover, and put into a 300 degree oven for at least 2 hours, giving it a stir every 30-45 minutes or so.   You want it bubbling ever so slightly, so adjust the heat accordingly.  It is done when the sauce is reduced and thickened a bit, and the meat is falling apart and the bones are clean.  I held mine at 200 degrees for a few hours while waiting for my husband to come home for dinner.  Taste test and add salt and pepper if needed.


To serve, remove the bones, add the sour cream and mix through until creamy, and ladle over egg noodles.


It's incredibly delicious!  I did not add it this time, but next time I will add some chopped sundried tomatoes for a little chewy, tangy bite.
Pin It

0 White Russian Apple Pudding

Sunday, November 7, 2010


Why do I call this "White Russian"?  Because it's got Kahlua!  This is definitely a decadent dessert, or perfect with a hot cup of coffee to enjoy with friends.

For the apples
4-5 Granny Smith apples, peeled, cored and sliced into wedges
1/4 cup water
1/4 cup Kahlua
1/4 cup honey or brown sugar
2 Tbs apple cider vinegar
2 Tbs lemon juice
3 tsp vanilla extract
2 tsp ground cinnamon
1/4 tsp salt

For the custard
1 loaf (5-6 cups) of stale bread cut into cubes - French, sourdough, whatever you like
1 cup heavy cream or almond milk
1 cup milk
4 eggs
3/4 cup brown sugar
1/4 cup Kahlua
2 tsp vanilla extract
1/2 tsp salt


Topping
2 Tbs room-temp butter
chopped pecans (optional)
maple syrup (optional)

First you need to make the apples to later add into the custard.  In a medium heavy lidded saucepan combine all the apple ingredients over medium heat.


Cover and simmer on medium-low for about 20 minutes, stirring every few minutes...


...until it looks about like this, the apples are cooked down and the sauce has thickened.  If it's still a little watery, just uncover and simmer another 5ish minutes to reduce.  Take it off the heat and let it cool for about 10 minutes.


While the apples are cooking, get started on your custard.  Mix together everything in the custard category except for the bread cubes and Kahlua.


Next, add the apple mixture.  If it's still hot, make sure you temper the custard as you're adding to it.  Just add one spoonful of the hot apples first, and quickly whisk it together.  Keep adding the apples in this manner until you get about half way through, and then add the remainder and whisk together thoroughly.  If you add them all in at once, you will scramble the eggs!


Now, add the Kahlua to the warm custard.  Half the Kahlua was cooked down in the apples, and the other half is being added to the custard now.


Next, in a large bowl pour the custard mixture over the bread cubes.  I used my homemade bread I made last week for this recipe.  Gently combine and let the bread and custard sit for at least 30 minutes (or overnight.)  When you're ready to bake, lightly grease a baking dish with cooking spray or butter and pre-heat the oven to 375.  Pour the soaked bread cubes into the dish.


For the topping, sprinkle the chopped pecans all over the top, if using, and dot the top with bits of the butter.


Place into the 375 degree oven and bake for about an hour.  The top will get slightly crispy, and the middle will be creamy deliciousness.


At this point, I always drizzle a healthy amount of maple syrup all over the top, and it soaks in.  With every bite you get tender chunks of apple and the sweetness of the Kahlua.  So good!
Pin It

2 Mon Poulet Rôti (aka, the Best Roast Chicken EVER)

Wednesday, November 3, 2010


I've been making this recipe for a few years. I have other recipes that I like, but this one is by far the easiest, yields the crispiest skin and juiciest meat. It's the famed Thomas Keller's Mon Poulet Rôti, found on Epicurious.com.

Ingredients:

Small 2-3 lb hen
kosher salt
fresh cracked pepper
few teaspoons thyme
1/2 medium onion roughly chopped (opt)
3-4 cloves smashed garlic (opt)

Yes, really, that's all you need.

Pre-heat the oven to 450 degrees.

While I was at Costco the day I made this, I found these nice Coleman Organic hens in a two pack, so of course I knew exactly what I'd be doing for dinner that night.


Rinse and dry the chicken thoroughly.  Stuff some paper towels between the wings and drumsticks, and in the cavity (and remove those giblets, though mine didn't have any) and get it really dry.  Then set it up in your roasting pan.  I like to leave some of the paper towels there for now to help with grip.


Salt and pepper the cavity well, and stuff it with the onion and garlic, if using.  It takes a bit longer to cook when you use the aromatics, but I really like the flavor they impart.


Cover the cavity, flip over and salt and pepper the back and breast liberally.  Truss the chicken if you like (it's quite easy - here's a video tutorial)  Mine looks sort of weird because I could not for the life of me find my butcher's twine, and so instead I used doubled up cotton sewing thread.  Whatever works, as long as it's a natural fiber!

Before trussing:

After trussing with my pitiful, fragile cotton thread.  Place the seasoned, trussed chicken into your roasting vessel of choice.  Here I'm using my oval 3.5 quart vintage Le Creuset roaster, but I've also made this in shallow rectangle roasting pans with equal results, it's just a little messier for whatever reason.


Slide it into the oven, and then don't touch it!  No basting is necessary.  Roast at 450 for about an hour, until the juice runs clear and the meat reaches an internal temp of about 165.  Mine was a little larger, so it was done in an extra 20 minutes.


Remove the roaster and add the thyme to the juices in the pan, and then baste the chicken all over with the drippings.


Then I like to finish with another sprinkle of thyme on top.  For a quick and easy veg, chop the other half of that onion, some bell peppers, mushrooms, asparagus, zucchini - whatever you like - and toss with some olive oil, salt and pepper, and roast during the last 15 minutes at 450.


The meat is sooo tender and juicy, and it really couldn't have been easier!  It tastes decadent without being so, though you could certainly up the luxe-factor and do as Thomas Keller suggests, and slather the meat with fresh butter and Dijon mustard.  Amazing!

My excellent lunch of cold roast chicken the next day with a side of pan roasted mushrooms and asparagus.


Pin It

31 How To Make The Perfect Grilled Cheese

Monday, August 9, 2010


I know what you're thinking.  "Is she really going to tell us how to make grilled cheese?  Really?"  Yes, really!  I only recently discovered the secret to perfectly toasty, melty grilled cheese sandwiches.  You may already know the secret, but I'm telling you, I was at a grave disadvantage for years.  I'd never had a real grilled cheese sandwich until I was a teenager.  My father's version of what he called "cheese on toast" was a piece of wheat bread, toasted [and usually burned] and then a hunk of cheddar thrown on top dry and then microwaved.  I loathed this, so I couldn't imagine why anyone would actually choose to eat grilled cheese.  My father is English and will literally eat anything that could possibly be classified as food, and thus could not understand what my problem was.  For example, my parents were married 20 years before she found out he didn't actually like her tuna curry (which I love, BTW.)  So, this post is for all you similarly disadvantaged people.

Fast forward to today.  After a lot of experimentation, I have a good formula.  I'm saying this with all seriousness, because I have made plenty of grilled cheese sandwiches that have been burned on the outside and not melted at all on the inside.  It's really almost as sad as the "cheese on toast" of my childhood.

First, I like to shred my cheese.  I wouldn't say it's absolutely necessary, but it does make for a more uniform melt, in my opinion.  Here I have pre-shredded Mexican blend cheese, but you can use any cheese you want (I really like pepper jack!)


Next, choose your bread.  White, wheat, sourdough, croissant.  It's all good in my book.  I have the very last bit of a white loaf, and thus the heel - don't hate!  Top the slices with as much cheese as you like.


Top the cheese with the other slice of bread, and put it in (drum roll please...) The Microwave!  Just for 20-30 seconds.  Trust me, this is how you make fool-proof grilled cheese, every time.  It's not only really tasty, but it's fast.


Okay, is it strange that I only just noticed the Turntable button on my micro by looking at this picture?  Weird.


  30 seconds later...Voila!  Melty cheese! It's not totally melted, but it's well on its way.


While you were waiting, you heated up your skillet, right?  I'm using my brand new vintage Descoware enameled cast iron skillet.  Usually I make it in a heavy non-stick, but as you can tell, this worked perfectly.  Melt a pat of butter over medium heat.


You're ready to go when the butter gets foamy and starts turning the slightest bit golden.


Quickly swipe one side of the sandwich bread in the butter and then turn it over on the other side to start toasting in the rest of the butter (otherwise just make sure to butter the other piece.)  You'll probably only need to toast it for 2-3 minutes tops (and no need to smash it down.)  Flip it and toast the other side, same amount of time.


Doesn't that look good?  The cheese is perfectly melty on the inside, and toasted golden brown on the outside with a great crunchy, crispy bite.

It's much easier to cookie-cut a very crispy grilled cheese sandwich than a mushy one.  The one above turned into this adorable maple leaf.


If you want to fancy it up, you can add some ham, chicken or turkey and a swipe of Dijon mustard before heating...yum!

Pin It

8 Flea Market Treasures, Continued

Saturday, August 7, 2010

I suppose you could call eBay a flea market of sorts.  In my previous post, I described how I found this cool vintage Descoware French oven in Tennessee.  Later that evening, I hopped on eBay to search for a matching pot/lid combo for my two finds, and stumbled across a big Descoware listing ending in the next 30 minutes. It was a gorgeous flame-orange set of 6 pots and pans, with two lids, so 8 pieces total measuring 9 1/2" (5 qt) French Oven, 9 1/2" Large Skillet, 8 1/2" Pot, 8" Skillet, 7" Pot and 5 1/2" Pot, all listed in "Very Good" condition. Can you imagine my excitement?  I'm such a dork.

The listing had already 9 bids, but was only up to $32. I put in my bid, substantially higher, hoping against hope that I'd win it for so little (I mean, for 8 pieces of Descoware??) I anxiously awaited the end, and sure enough, a few more bidders jumped on the bandwagon in the last moments. But I prevailed, and won my set for a staggeringly low $57, plus shipping. They arrived the other day and they are absolutely gorgeous! Every piece is genuine, except for two which I think are a little suspect - there are no markings whatsoever on the one of the bottoms, and the handle is slightly different than its similar marked counterpart (edit 11/6/10: the two pieces actually go together!  The small fry pan with no marking on the bottom is actually a double-duty lid for the larger one!) But it's still a beautiful enameled cast iron pan, and coincidentally, the orphan lid I got at the flea market fits it nicely.  It also makes a fantastic grilled cheese sandwich, and if it can do that, then that's all I need to know!

I cannot express how pleased I am with this amazing find.  My husband begs me to stop the collection where it is, because we are seriously low on storage space.

Garish flash photo, but it shows the gorgeous flame orange paint.


It happily joins the rest of my Le Creuset collection, some modern, some vintage.


I'm just giddy with excitement over this!  I can finally make Boeuf Bourguignon for a crowd in a proper French oven!

**Edit 7/6/13**

Boy have I been busy collecting!


Pin It
Related Posts Plugin for WordPress, Blogger...